
Pygame is a framework for building games with python. If you’re working on your local computer (not Replit.com), please get started by downloading the starter project here. If you’re on Replit.com you can find the starter project. Take a few minutes to look through the code. Run it – if it doesn’t run you may need to install Pygame on your computer. When it runs you should see a paddle (red) and a ball (yellow) on a black background. Starting with this project, we’ll make a simple brick breaker game.
A tour of the Starter Project
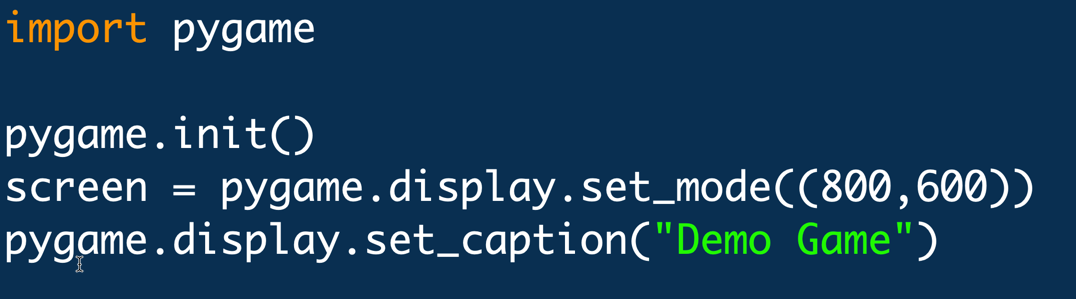
This code makes the window size 800 pixels wide and 600 pixels tall, with a caption at the top. You can change these to see what happens, but change them back.
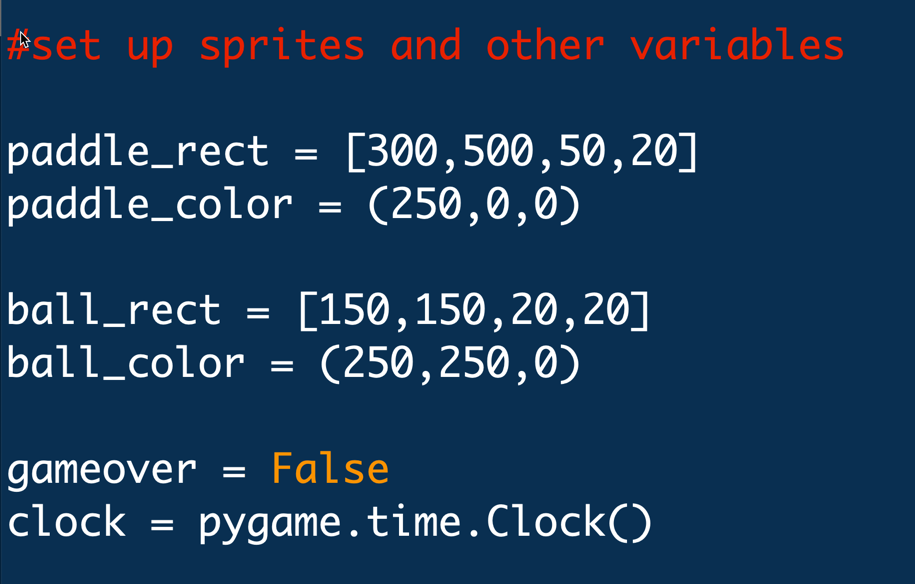
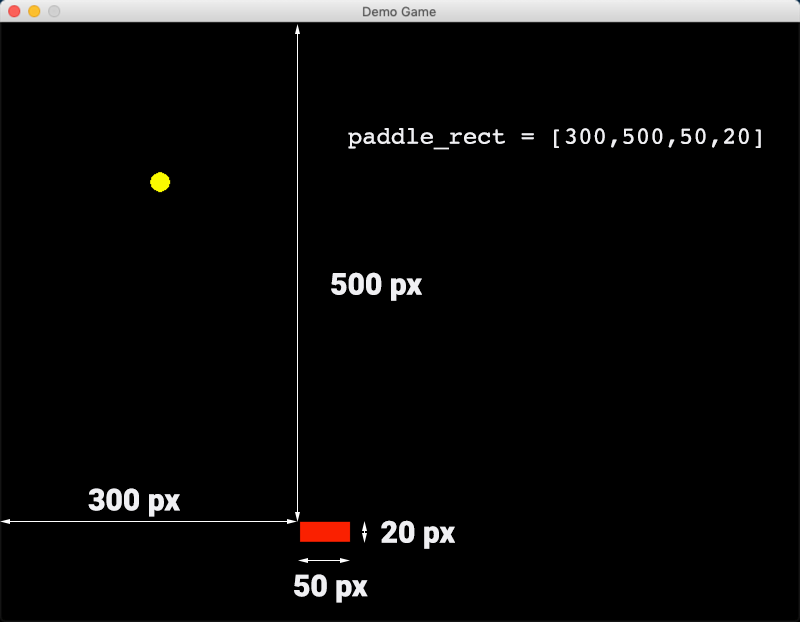
Here we set up some variables. The first one, paddle_rect, is a list of four values. The first value, paddle_rect[0], is the x position of the top left corner of the paddle. The next is the y value of the top left corner of the paddle. The next two, 50 and 20 are the width and height of the paddle.
Try putting the paddle at some different positions. Try changing its width or height. Note that the positions of the paddle and ball are given as lists, with square brackets. The colors are given as sequences, with parentheses. The reason for this is that sequence values cannot be changed, while list values can. So if we want to move the objects, we need to give these values in a list.
The Game Loop
Think of a game like a movie, but with user interaction. It is broken up into frames, which are shown to the player in rapid succession to give the illusion of motion. In code, we write a loop that only stops when the game is over. The code in this loop is broken into parts as follows:
- Respond to user input (keys, mouse). We change variables here – but we don’t directly draw here.
- Make computer controlled changes. Again, change variables based on what is happening in the game.
- Handle collisions between objects (This is an extension of #2).
- Draw the game, based on the current values of variables.
The Starter Project game is set to run at 60 frames per second.
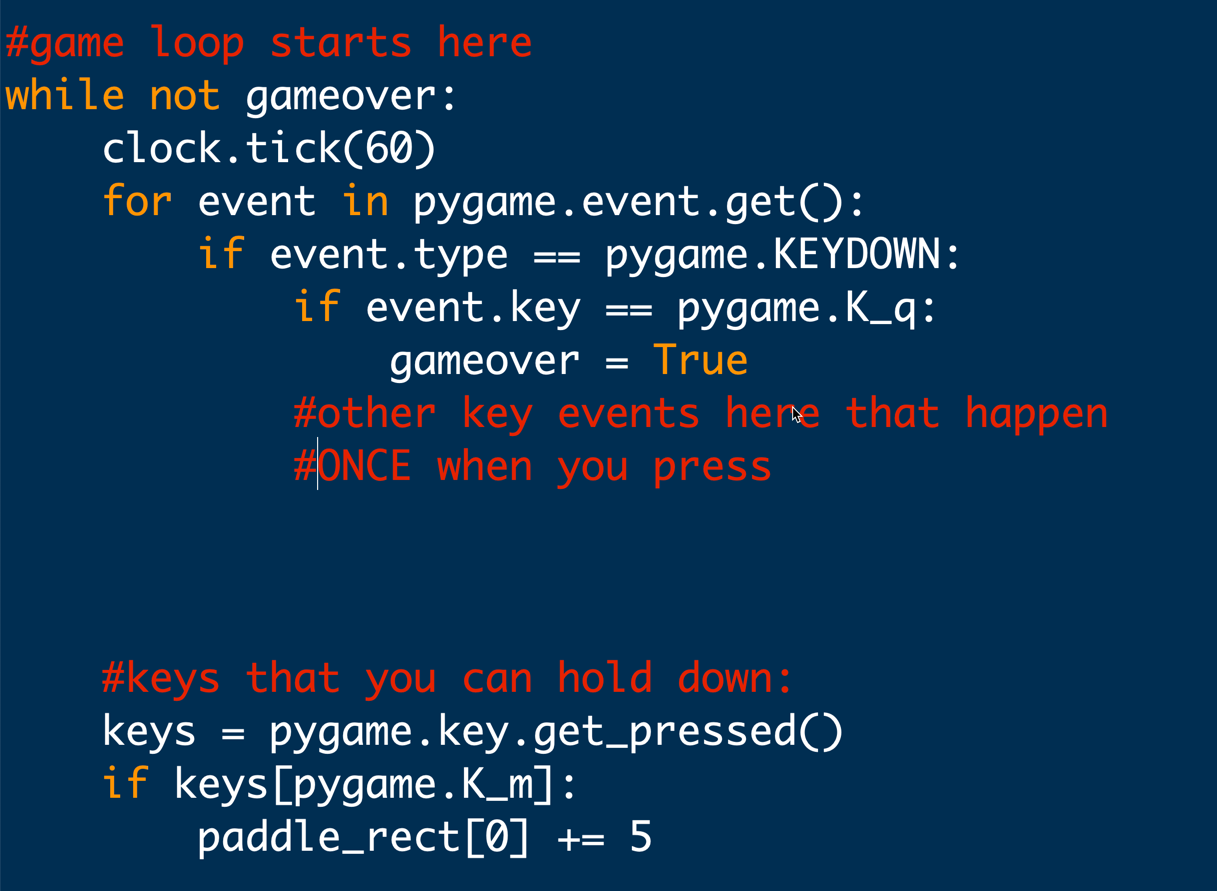
There are two types of key events that pygame is designed to handle. The first kind, illustrated in the for loop above, are key events that happen once per key press. If you’re trying to figure out which to use, ask this question: “What should happen if the player holds the key down?” If the answer depends on how long the player holds the key, then you want the second kind. In the Starter Game, pressing the q key quits the game. But holding down the ‘m’ key moves the paddle to the right (we’ll discuss motion next), and the paddle will continue to move right as long as the ‘m’ key is depressed.
You can look up more key codes here. Note that many of these key codes are in all caps.
Motion
To make an object move, we need to change its position. If we change it a lot in a single frame, it will just appear to jump from one place to another. If we move it just a little, but do so over and over and over in successive frames, the object will appear to move smoothly from one place to another.
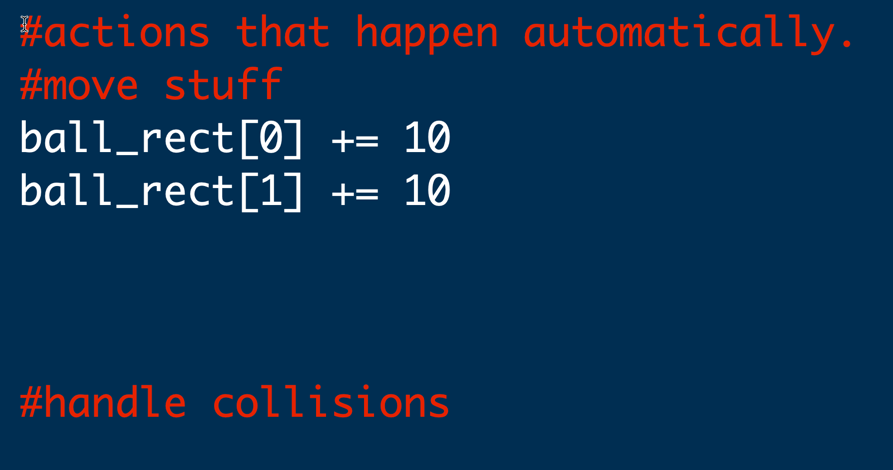
Here we’re adding 10 to the x and y positions of the ball each frame. This makes the ball move down and to the right. But in order to make it bounce, we’ll have to use a variable instead of just the number 10.
There is no collision handling yet. We’ll add that in a later part of this tutorial.
Drawing
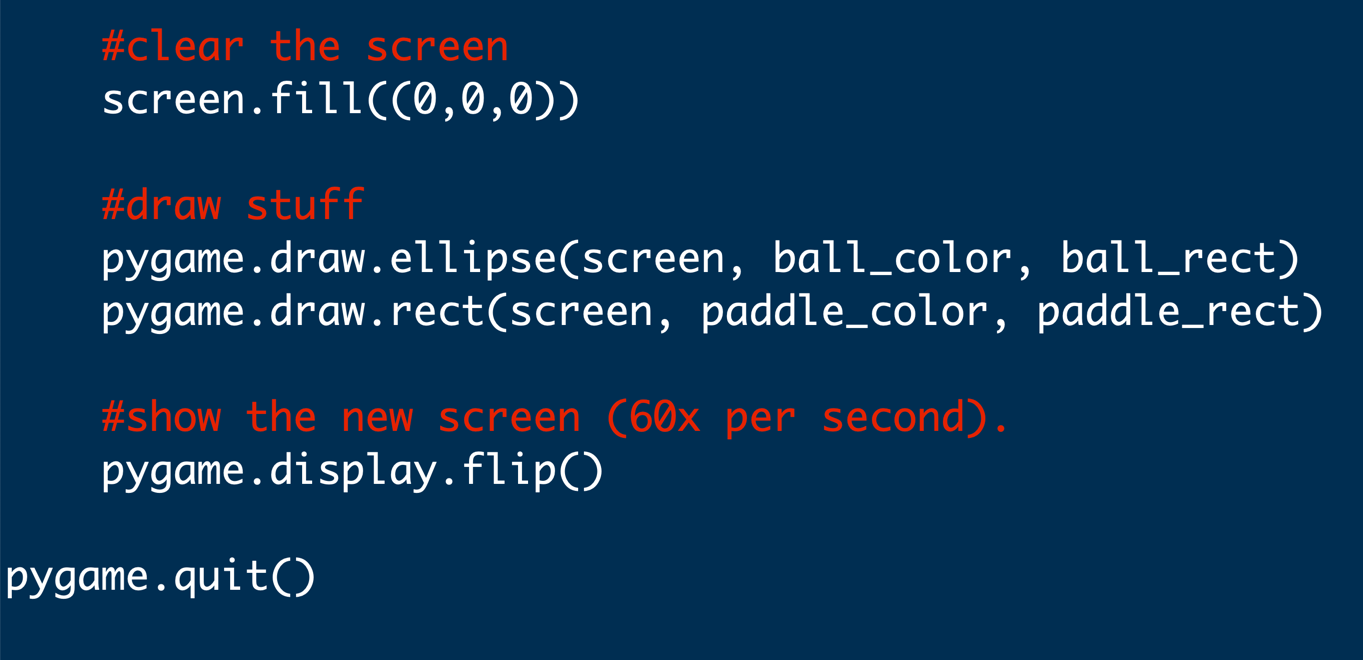
Here is where we draw the paddle and ball on the screen. Drawing always begins by filling the screen with a solid color (in this case black). Drawing always ends with the command pygame.display.flip(), which puts our completed drawing on the screen for the player to see.
In between we draw an ellipse for the ball (its a circle, but you might remember that a circle is a special case of an ellipse) and a rectangle for the paddle. Later you’ll learn how to use images in your games, but for now we’ll stick to rectangles and ellipses.
Even though we’re drawing an ellipse for the ball, we use a rectangle to define its position. The ellipse of the ball is the one that fits exactly inside the rectangle.
Challenge
Change the program so that the paddle moves with both the left and right arrow keys (or some combination of your choice). Do this before going on to the next part of the tutorial.